


Once in a Blue Moon: Costa Business & Unmasking the Myth
- Duchess Flame
- Jun 20, 2023
- 5 min read
Updated: Jul 29, 2024

**SUBJECT TO CHANGE PORTING TO LIVE SERVERS**
With thanks to Garust, Vicyorus, SugarBombs.Rads, Coffee888, and GamerMOM.
Dedicated to Carl, thank you for your wild imagination.
To start, head to Big Bend Tunnel East.

The quest will pop up on your screen and in your pip boy.

Follow the map marker to Vinny.

Interact with Vinny and select "I'm looking for some work" in the dialogue box.
Vinny will ask you to go and speak to one of his staff, find out why they are feeling miserable, and then return back to him.
This is a series of "daily" side quests. Each day you will need to go and visit Vinny and he will tell you which staff member to speak to next.
There are 8 staff members in total to find and speak to. You can only visit one staff member every 20 hours and you need to visit each one in the order that the game tells you.
I have kept the quests vague as there are a lot more dialogue and storyline options, but I don't want to spoil them.
#1 Kieran

Quest:
Kieran will send you to Nuka World on Tour to collect 5 Nuka-Cola trucks.

Once you arrive at Nuka-World, there are map markers for you to follow to the location of each truck.

Collect 5 Nuka-Cola trucks and then return back to Kieran.

The trucks will only spawn if you have the quest in your pip boy and no other player can collect them.
Rewards:
Base Caps: 80
Base XP: 200
Contextual Ammo
Brew Goodies or Aid Goodies x1
Plan: Blue Ridge Toy Truck (Tradeable)

#2 Eugenie

Quest:
Eugenie will send you to Summerville to locate a letter for her.

Once you arrive at Summerville, there is a map marker for you to follow to the letter's location.

Collect the letter and then return back to Eugenie.

Rewards:
Base Caps: 80
Base XP: 200
Contextual Ammo
Brew Goodies or Aid Goodies x1
Plan: Blue Ridge Themed Stash Box (Tradeable)

#3 Rudy

Quest:
Rudy will give you a shopping list and ask you to collect the items on the list.

The game will give you map markers for all the item locations. The items spawn in containers so no other player but yourself can take them.
A box of canned chicken

A box of canned pork

A box of canned corn

A box of canned beans

A box of canned "tatos"

Once you have collected everything, return the items back to Rudy.

Rewards:
Base Caps: 80
Base XP: 200
Bonus Caps: 10
Contextual Ammo
Brew Goodies or Aid Goodies x1
Rudy's Canned Pozole (+1 Luck & +2 Charisma for 10 minutes)

Plan: Clean Blue Ridge Sleeping Bag (Tradeable)

Once you have completed Rudy's quest, he will sell Rudy's Canned Pozole permanently in his inventory.

#4 Libby

Quest:
Libby will send you to Pleasant Hills Cemetery to locate some parts for her gun.

Once you arrive at Pleasant Hills Cemetery, your HUD will have an area search marker. Once you get close enough, it will turn into a map marker.
Collect the shovel from the mausoleum.

Dig up the unique repair parts.

Collect the parts and then return back to Libby.

Rewards:
Base Caps: 80
Base XP: 200
Contextual Ammo
Brew Goodies or Aid Goodies x1
Plan: Blue Ridge Guardsman Paint (Non-tradeable)
*Only works on Combat Armour. The Combat Armour is tradeable once painted.

#5 Herschel

Quest:
Herschel will send you to Torrance House to retrieve 5 notes written by Jacque.

Once you arrive at Torrance House, there will be map markers for you to follow to the location of the notes.

Collect the notes and then return back to Herschel.

Rewards:
Base Caps: 80
Base XP: 200
Contextual Ammo
Brew Goodies or Aid Goodies x1
Plan: Blue Ridge Scout Helmet (tradeable)

#6 Vera
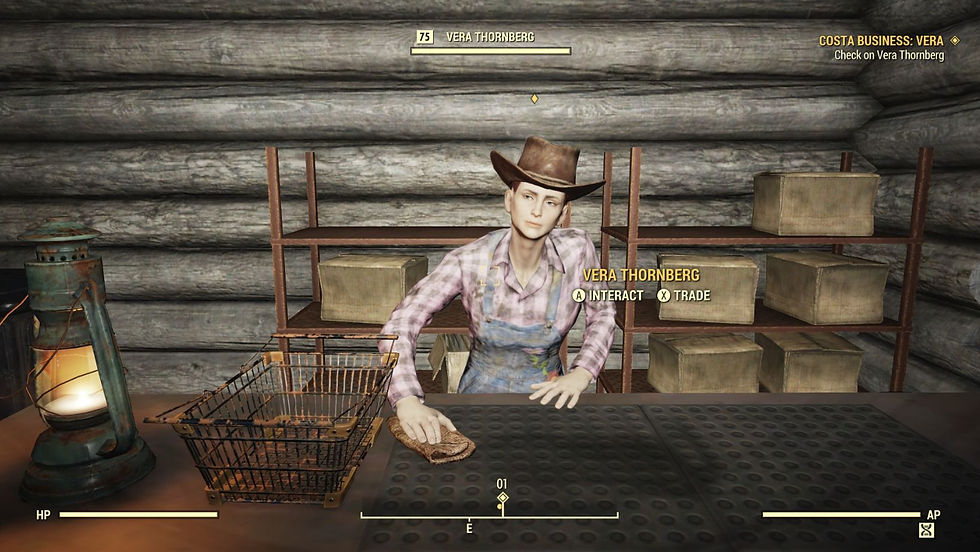
Quest:
You will need to have finished The Bucket List quest and have a camera with film in your inventory.
Vera will send you to three locations to take some photos. You do not need to save these photos for them to count.
Once you arrive at the location, your HUD will have an area search marker. When you get close enough to the sign, it will turn into a map marker.
Photo 1 - Mountainside Bed & Breakfast sign
It's worth sticking your head in here and looting the kitchen.


Photo 2 - Sign at the Cow Spot Creamery
Don't forget to collect the cream!


Photo 3 - Ferris Wheel Tyler County Fairground
There are a few ingredients scattered around here.


Take the photos and then return back to Vera.

Rewards:
Base Caps: 80
Base XP: 200
Dialogue Caps: 10
Contextual Ammo
Brew Goodies or Aid Goodies x1
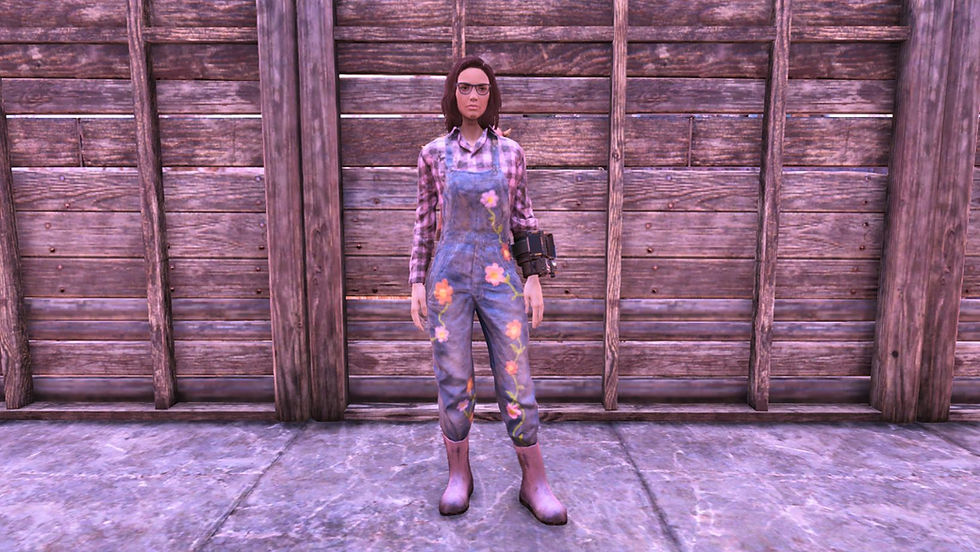
Plan: Vera's Outfit (Tradeable)
#7 Carver

Quest:
Carver will send you to Lewisberg to find a note from his late father. There will be an area search marker on your map.

The note will be in the greenhouse at the back of the house.

The note will tell you to go to a nearby Garrahan mine.

Follow the map marker to the note.

Retrieve the missing item.

Return everything back to Carver.

Rewards:
Base Caps: 80
Base XP: 200
Contextual Ammo
Brew Goodies or Aid Goodies x1
Plan: Trucker Uniform (Tradeable)

#8 Aries

Quest:
You will have needed to have completed the Laying Lowe questline, the Out of the Blue questline from Steel Reign, AND completed the other 7 Blue Ridge NPC's questlines for this side quest to pop up.
Aries will ask you to collect holotapes from all over the map. These holotapes will spawn in containers at the below locations:
Holo 5 - Scoots Shack
Holo 4 - Lost Home
Holo 3 - Welch
Holo 2 - Uncanny Caverns
Holo 1 - Van Lowe Taxidermy
Holo 6 - Given to you by Aries
Once you arrive at each location, follow the map markers on your HUD to the container.
Rewards:
Base Caps: 80
Base XP: 200
Contextual Ammo
Brew Goodies or Aid Goodies x1
Plan: Sheepsquatch Poster (Tradeable)

Rewards List
Downloadable version here.

Brew Goodies loot pool
Wine
Bourbon
Vodka
Whiskey
Cranberry Moonshine
Mountain Honey Moonshine
Blackwater Brew
New River Ale
Oak Holler Lager
Old Possum
Pickaxe Pilsner
Vintage Nukashine
Stimpak
Irradiated Sugar Bombs
Aid Goodies loot pool
Stimpak
Stimpak: Super
RadAway
Purified Water

Hi, I'm Kat or Duchess
I'm an Australian data miner who writes farming, event, and food buff guides for Fallout 76.
I believe that all knowledge and information should be free, which is why my guides will never be locked behind a paywall. However, running a website and photo and video editing software does not come cheaply.
So, If you found my guides helpful, please consider buying me a ko-fi (coffee) using the link below.
All monies go towards the tools for writing my guides and maybe for an actual cup of coffee or 3 ;)
Alternatively, share my guides with your fellow vault dwellers and help them to survive the wasteland.
Comments